Virtual Try On vs AI Clothes Changer
Virtual Try On vs AI Clothes Changer: compare inputs, limits, and the right tool for each job before you shop or edit.
Virtual try on and an AI clothes changer can both show a new outfit on a person, but they are built around different decisions. Virtual try on usually starts with a specific product and asks, "How might this item look on me?" An AI clothes changer starts with a photo and asks, "How can I change the outfit in this image?" Choose virtual try on for shopping context. Choose an AI clothes changer for photo editing, creative styling, and content production.
The boundary is not absolute. Many tools use the same image-generation ideas, and product pages often use the terms interchangeably. The useful distinction is the job the interface helps you finish, the inputs it accepts, and what you can reasonably conclude from the result.
| Question | Virtual try on | AI clothes changer |
|---|---|---|
| Main job | Preview a specific item before buying | Replace or redesign clothing in a photo |
| Typical input | Your photo plus a retailer product image | Your photo plus garment images or a written prompt |
| Typical output | A shopping preview tied to one product | An edited image ready to download or refine |
| Best control | Product selection, sometimes model or size context | Garment, color, material, length, and keep-list prompts |
| Good for | Style checks and purchase shortlists | Creative variants, social images, and product content |
| Does it prove fit? | No, unless the system uses verified body and garment measurements | No |
Why virtual try on and AI clothes changer overlap
Both workflows combine information about a person with information about new clothing. Early image-based virtual try-on research described the task as synthesizing a person wearing a target garment while deforming that garment to the person's pose. The original VITON research focused on producing a photorealistic image with recognizable garment details.
Current generative systems can make that same basic transformation through a more general editing interface. Google's account of its apparel model, for example, describes sending the person image and garment image through separate networks, then combining their information to generate the result. That technical explanation of virtual try on sounds close to what a clothes-changing editor does because, at the image level, it is close.
The product experience creates the practical difference. A retailer's try-on button already knows the exact listing, seller, product images, and available options. A clothes changer gives the user more freedom. You may upload a shirt from your closet, describe an outfit that does not exist as a product, replace only the jacket, or keep editing the result after the swap.
What virtual try on is designed to do
Virtual try on belongs inside a shopping journey. A shopper finds an item, opens a virtual try on app or a retailer's try-on feature, supplies a photo or selects a model, and sees the item rendered on that person. Google's 2025 shopping update describes this flow directly: users can upload a photo and try apparel listings on themselves while shopping. The goal is to reduce the gap between a product photo and a personal visual preview. See Google's current shopping try-on overview.
This structure makes virtual try on useful for a narrow set of questions:
- Do I like this color near my face?
- Does the overall silhouette suit the photo I uploaded?
- Would I wear this product with something I already own?
- Which two shortlisted styles should I inspect more closely?
The tradeoff is a more constrained workflow. Many retail implementations work only with supported listings. The tool may accept one item at a time, limit the available poses, or end when the preview is generated. That is sensible for shopping, but restrictive when you need a finished marketing or social image.
What an AI clothes changer is designed to do
An AI clothes changer is an image editor with a clothing-specific starting point. It usually asks for a person photo, then lets you provide a garment reference, write a description, or do both. The result is not necessarily tied to a store listing. The goal is to change the picture.
That wider input range changes what you can make. With the ImagEditorAI clothes changer, you can attach photos of real garments or describe a new outfit in words. A prompt can specify which garment goes where and list the face, hairstyle, pose, and background details that should stay. The edited result remains in the same workspace for another round of changes.
This makes a clothes changer a better fit when you want to:
- replace one item without redesigning the whole look;
- test a color, material, hem length, or styling direction;
- put your own garment photos onto a model image;
- create several outfit versions from one source photo;
- continue into background editing, cleanup, or enhancement.
For example, an online seller may have one model photo and several flat garment shots. A clothes changer can produce draft on-model concepts before the seller decides which combinations deserve a full shoot. A creator can keep the same pose and setting while testing three wardrobe directions for a post. A shopper can use it for a casual visual preview when the retailer does not offer a try-on button.
The freedom comes with more responsibility. The tool does not know the product listing unless you supply it. A vague prompt can invent design details. A poor garment image can lose texture or trim. You need to inspect the result rather than assume the uploaded garment was copied exactly.
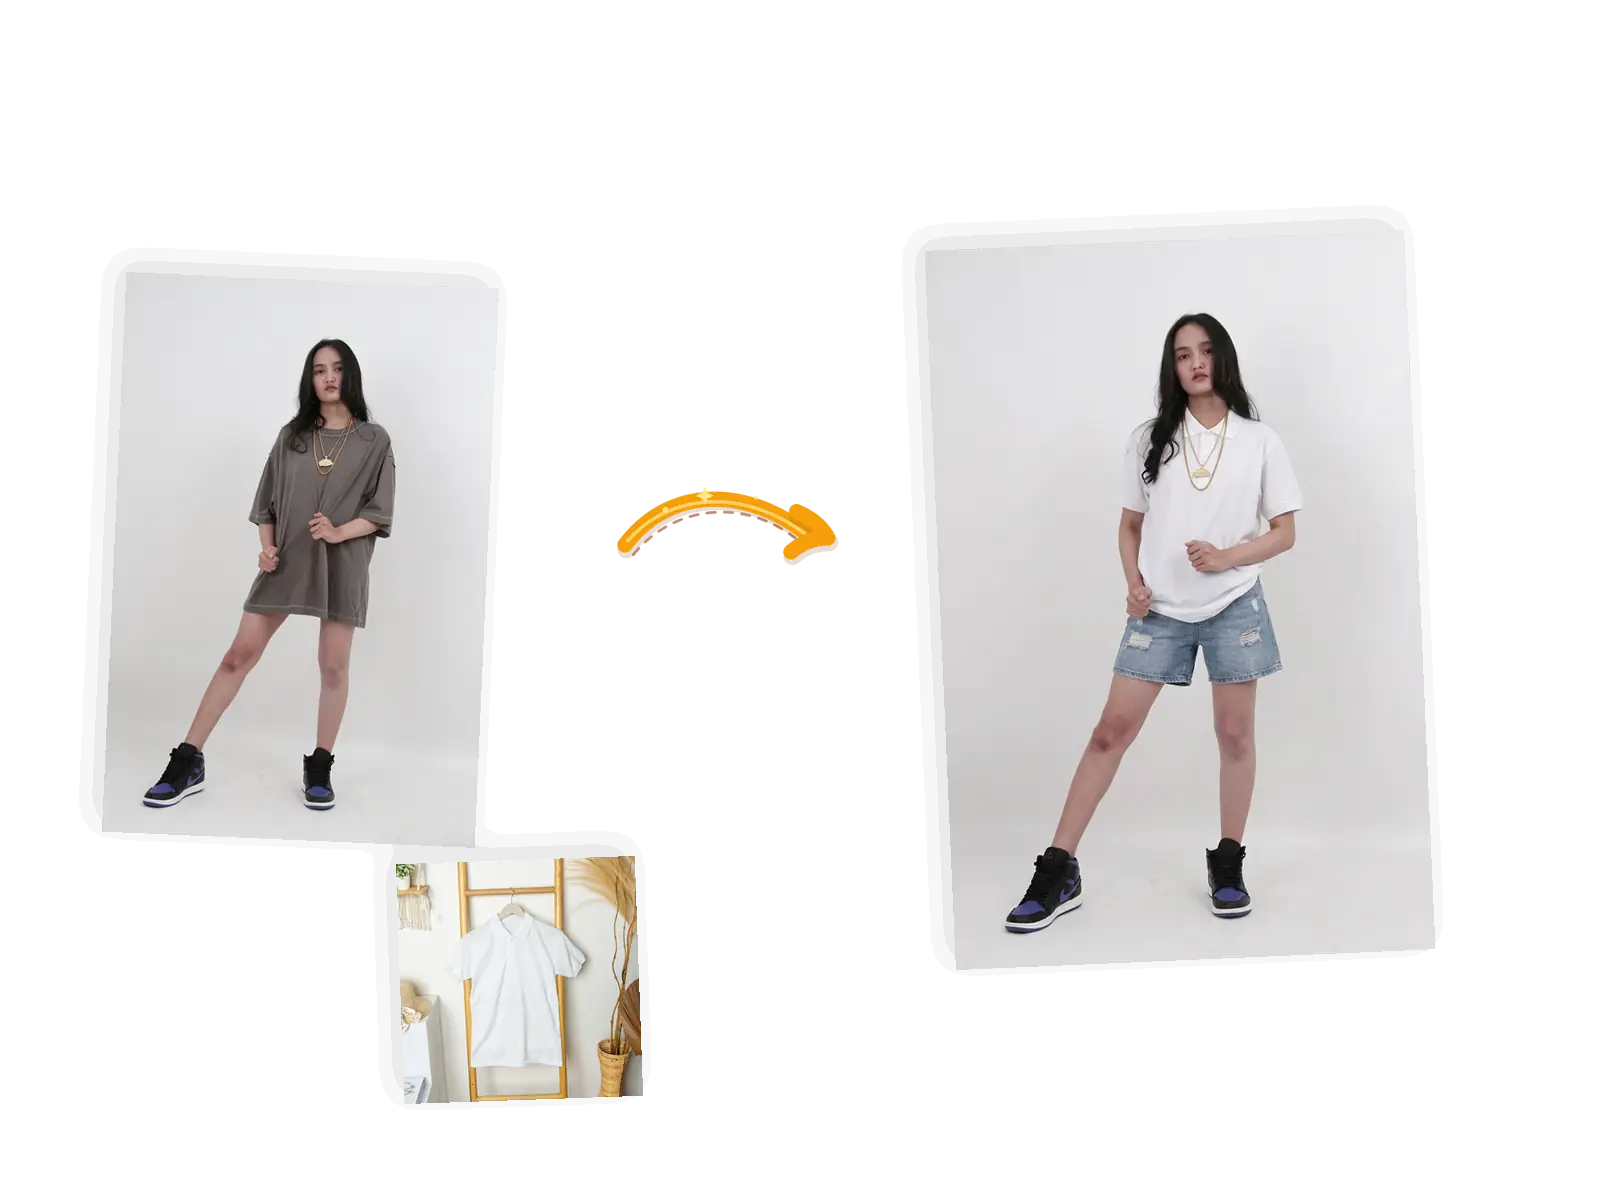
A clothes-changing workflow can start with a person photo and a separate garment reference, then keep the result available for more edits.
Virtual Try On vs AI Clothes Changer: choose by decision
The fastest way to choose is to name the decision you need to make after the image appears.
Choose virtual try on for a product decision
Use virtual try on when you already have a specific product in mind and the try-on experience is connected to that listing. Product context matters here. You want the exact item, not a loosely similar jacket generated from a short description. The preview is one piece of a purchase check that should also include measurements, materials, returns, and customer feedback.
This is especially useful when comparing colorways or broad silhouettes. It is less useful when your main question is whether size M will pull at the shoulder or whether a fabric will feel scratchy. A generated image has not measured your body or touched the fabric.
Choose an AI clothes changer for an image decision
Use a clothes changer when the edited photo is the deliverable. You may know the exact garment, have only a rough idea, or want to invent a look. The main question is whether the new outfit works in this photo and whether the rest of the image stayed close enough to the source.
Start with the AI clothes changer workspace when you need prompt-level control. If the next task is to prepare a store image, you can continue with AI product photography, create a white background, or use the ghost mannequin tool for a garment-only presentation.
Use both when shopping becomes content production
The two workflows can be sequential. A shopper or stylist might use virtual try on to shortlist real products, then use a clothes changer to compare a complete outfit in a particular photo. An e-commerce team might use a catalog try-on system on product pages and a clothes changer behind the scenes for campaign concepts, drafts, or creator briefs.
Keep the evidence separate. A shopping preview can inform a shortlist. An edited campaign concept can inform a creative direction. Neither should be presented as proof of physical fit or as a photograph of a real event that did not happen.
What neither tool can reliably tell you
The most important limit is size. A convincing image can show a plausible silhouette without knowing the garment's physical dimensions, your body measurements, the fabric's stretch, or how it moves.
Google's own try-on help page says its generated image does not determine or guarantee actual fit and tells shoppers to check size charts, reviews, and product details. Research on size-variable virtual try on explains the technical gap: many image-based methods deform clothing to the reference person without accounting for the physical size relationship between the person and garment.
Unless a product explicitly requests verified measurements and explains how they affect the output, treat these tools as visualizers. They can help with color, broad proportion, styling, and composition. They cannot confirm:
- which labeled size you should order;
- how tight a waistband or cuff will feel;
- whether a material is heavy, soft, warm, or itchy;
- how the garment behaves while you sit, walk, or raise your arms;
- whether every logo, seam, print, and fastening is product-accurate.
There are image limits too. Hair that crosses a collar, folded arms, loose layers, reflective fabric, small typography, and complex prints all give the model harder boundaries to reconstruct. Faces and body shape may drift between generations. Check those areas at full size, particularly if the image will be published or used to sell a product.
A practical workflow for a useful clothing preview
The same preparation improves both kinds of tool.
- Decide what the result must answer. Write one sentence before you upload anything. "Would I wear this color?" needs a different level of evidence from "Can this image go on a product page?"
- Use a clear person photo. Choose an evenly lit image with the relevant part of the body visible. A full-body photo works best for a complete outfit. Avoid crossed arms or large objects covering the garment area.
- Prepare the garment reference. Use a front-facing product or flat-lay image on a simple background. Make sure collars, sleeves, hems, and patterns are visible. A cropped or folded item gives the model less evidence.
- State the change and the keep-list. Name the garment, color, material, and length. Then name what should remain: face, hairstyle, pose, hands, body shape, lighting, and background.
- Generate one controlled version first. Do not change the garment, background, pose, and lighting at once if you need to diagnose a miss.
- Inspect the boundaries. Zoom in on the neck, hair, hands, waist, garment edges, logos, prints, and shadows. Compare them with both source images.
- Use the result at the right confidence level. A style preview can be useful with minor variation. A product image needs stricter garment detail and disclosure. A sizing decision still needs measurements and real product information.
For an image-editing workflow, upload the person photo first in the AI clothes changer, then add garment references. The editor accepts up to five PNG, JPEG, or WebP reference images, with a 20MB limit for each file. Each model can set a lower reference limit, which the editor shows before generation.
A useful prompt is specific without becoming a script:
Put the navy linen overshirt from image 2 on the person. Keep the face, hairstyle, body shape, pose, hands, lighting, and background unchanged. Keep the shirt untucked and preserve the visible buttons and chest pocket.
If the first result changes the face or background, shorten the creative part and strengthen the keep-list. If the garment looks generic, improve the source image and name the missing construction details. Change one variable per rerun so you can tell what helped.
Common mistakes when comparing the tools
Calling every wardrobe edit "virtual try on" hides useful differences. A tool that only accepts text may be excellent for styling ideas but weak for a real product preview. A retailer tool may preserve a specific listing well but give you no way to edit the scene afterward.
Another mistake is judging only by realism. A polished result can still change a logo, slim a body, shorten a hem, or smooth away a texture. Fidelity to the person and fidelity to the garment are separate checks. Compare the output with both inputs, not just with your memory of them.
Finally, do not treat a generated drape as a measurement. The image may help you decide that a boxy red jacket is not your style. It cannot tell you that the medium will close comfortably. Use the retailer's size chart and garment measurements for that decision.
FAQ
Is an AI clothes changer the same as virtual try on?
Not exactly. Both can render new clothing on a person, but virtual try on is usually tied to a shopping product and a purchase decision. An AI clothes changer is an editing tool for replacing or redesigning clothing in a photo. Some products combine both workflows or use the labels interchangeably, so a virtual try on app may also include editing features.
Can virtual try on tell me what size to buy?
Not by appearance alone. A generated preview does not guarantee physical fit. Use the brand's measurements, size chart, material information, and customer reviews. Only rely on size guidance from a system that explicitly uses body and garment measurements and explains its method.
Can I use my own garment photo in an AI clothes changer?
Yes, if the tool supports garment references. ImagEditorAI accepts garment images alongside the person photo. Front-facing or flat-lay images with clear edges give the model more usable information than folded, cropped, or heavily shadowed photos.
Which tool is better for e-commerce sellers?
It depends on where the image is used. A catalog-connected virtual try-on experience helps shoppers preview listed products. A clothes changer helps a seller create draft on-model concepts, campaign variants, and edited product content. Product-facing images need close inspection for accurate logos, patterns, seams, and proportions.
Which tool is better for social media photos?
An AI clothes changer usually offers more creative control because you can describe a look, preserve the existing scene, and continue editing the result. Virtual try on is more useful when the post must feature a specific shoppable item from a supported retailer.
How do I keep my face from changing during an outfit swap?
Start with a sharp, evenly lit source photo and add a keep-list to the prompt. Name the face, hairstyle, body shape, pose, hands, lighting, and background. Generative results can still vary, so compare the output at full size and rerun with a simpler change if identity drifts.
Pick the tool that matches the next decision
Use a virtual try on app when you are evaluating a known product inside a shopping flow. Use an AI clothes changer when you need a changed image, broader styling control, or a result you can keep editing. In both cases, treat the output as a visual preview rather than proof of size or physical comfort.
If your next step is to change the photo, open the AI clothes changer, upload the person and garment references, and run one focused swap before adding other edits. For a look at the image model choices behind the editor, read GPT Image 2.5 vs GPT Image 2.