


Name the lens, not the lighting
Point at the glare you want gone: which lens and what caused it. The edit targets that spot instead of brightening the whole picture, so the rest of the frame keeps its original exposure.
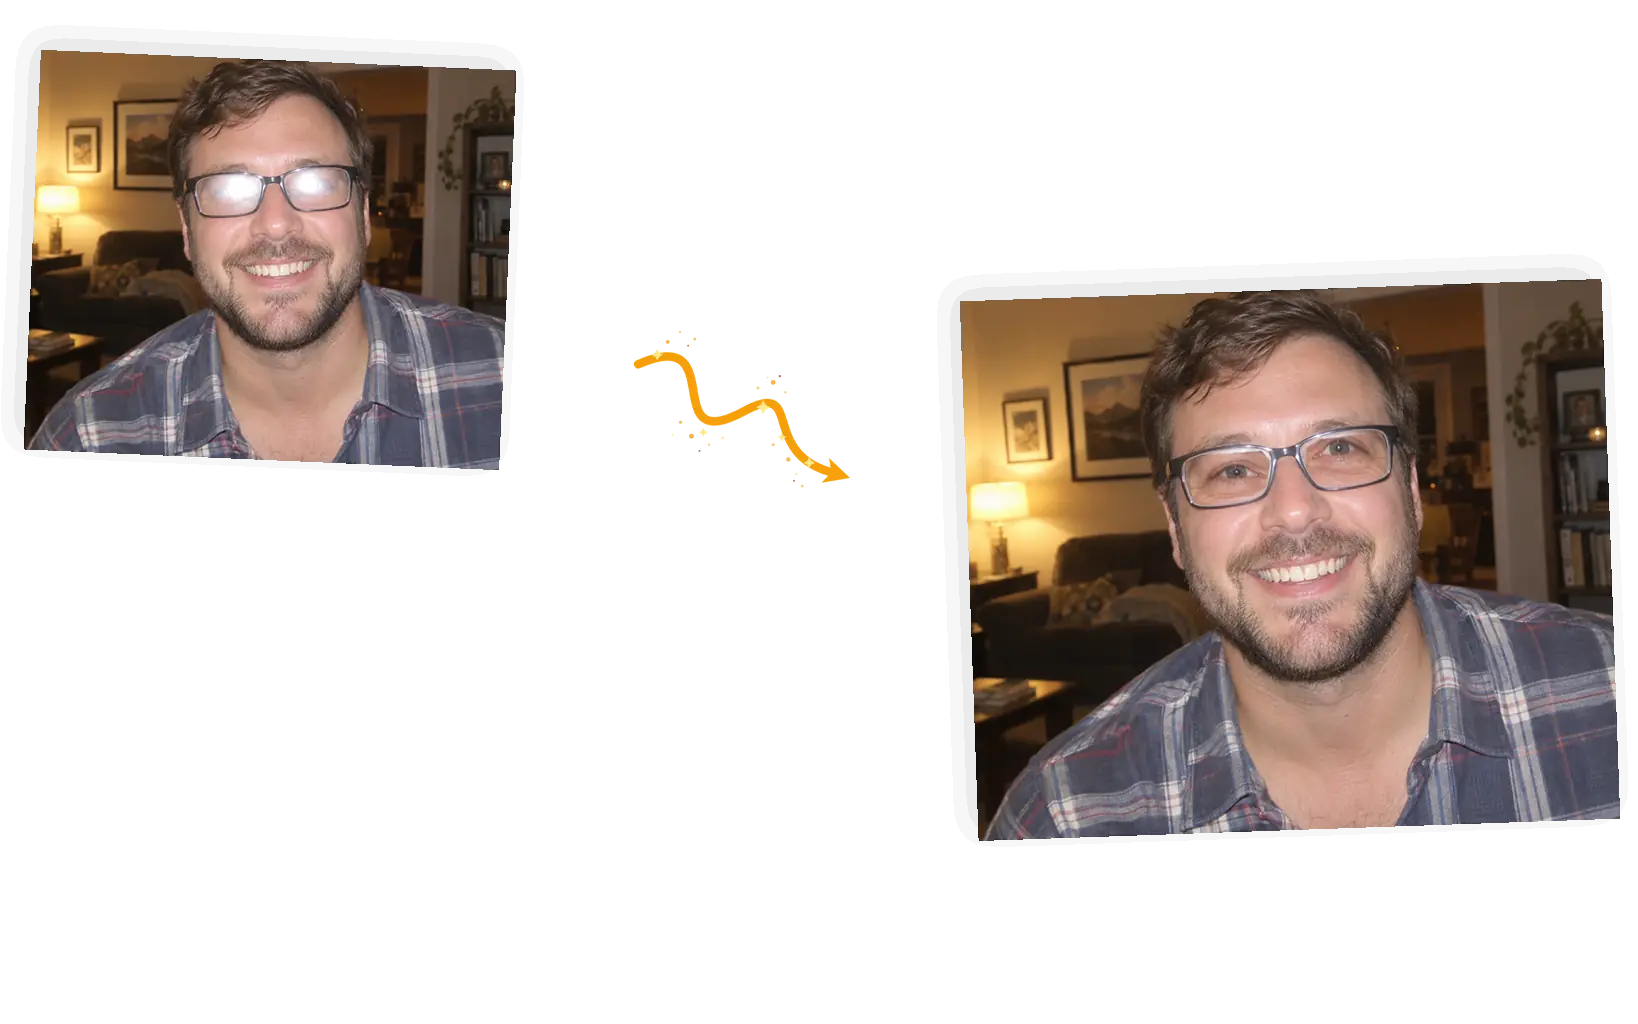
Upload a photo and name the glare: the flash hotspot on a lens, the window stripe across both, the street scene sitting in dark sunglasses. The editor rebuilds what the reflection covers while the face and the frames stay put.
Example 1 of 3
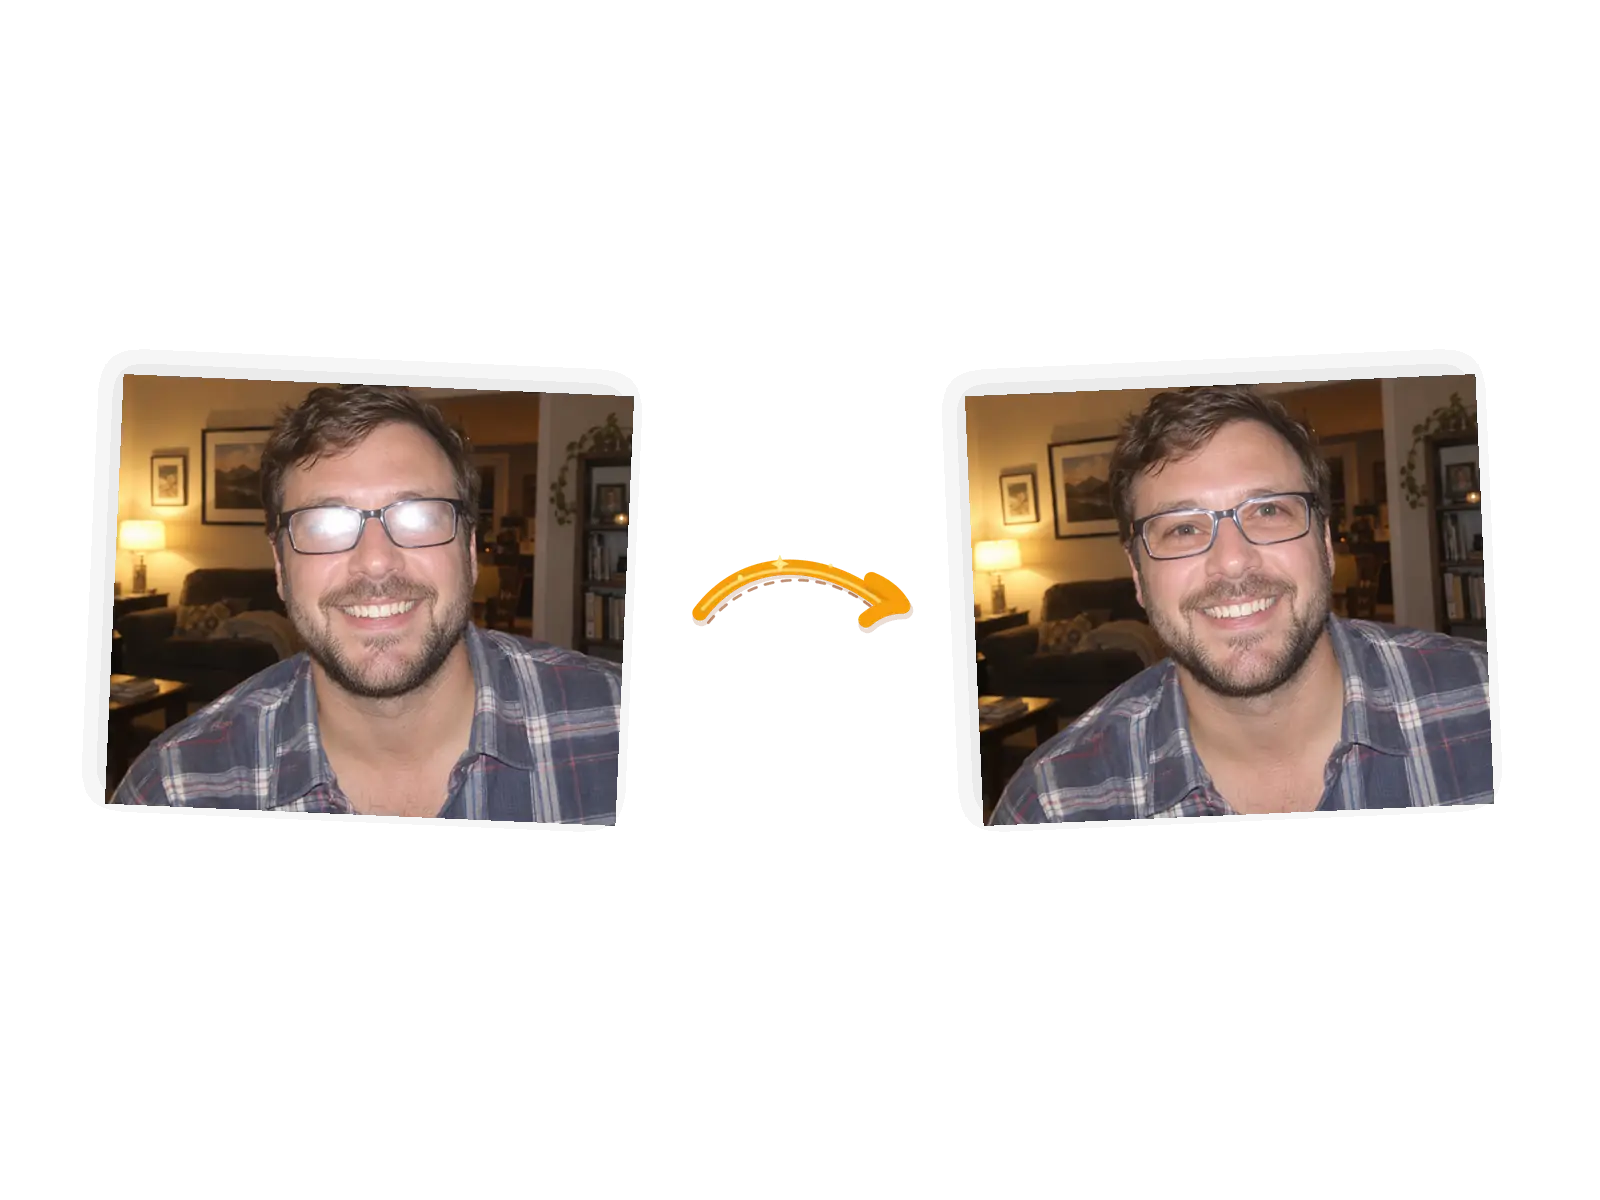
Remove the white flash glare from his left lens and rebuild the eye behind the glass. Keep his facial features, hairstyle, glasses frames, pose, and the background exactly unchanged.
Point at the glare you want gone: which lens and what caused it. The edit targets that spot instead of brightening the whole picture, so the rest of the frame keeps its original exposure.
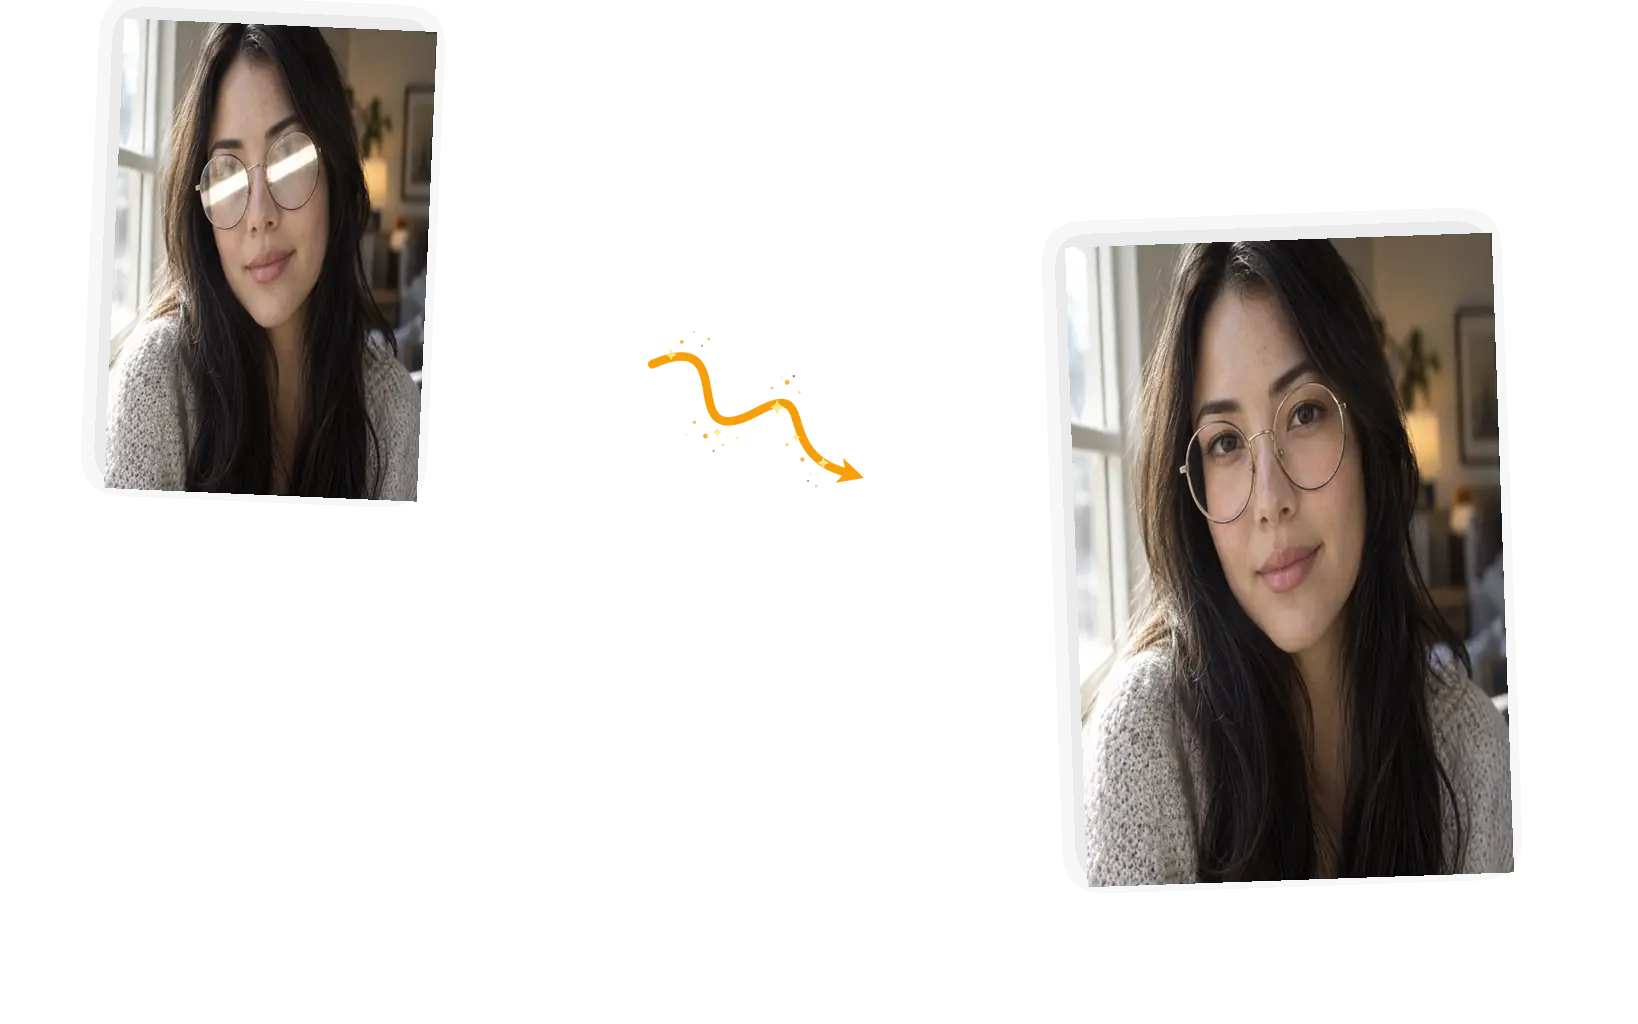
Say what must not move: the facial features, the thin metal frames, the pose. Frames are the usual casualty of glare fixes; naming them keeps the glasses looking like the same glasses.
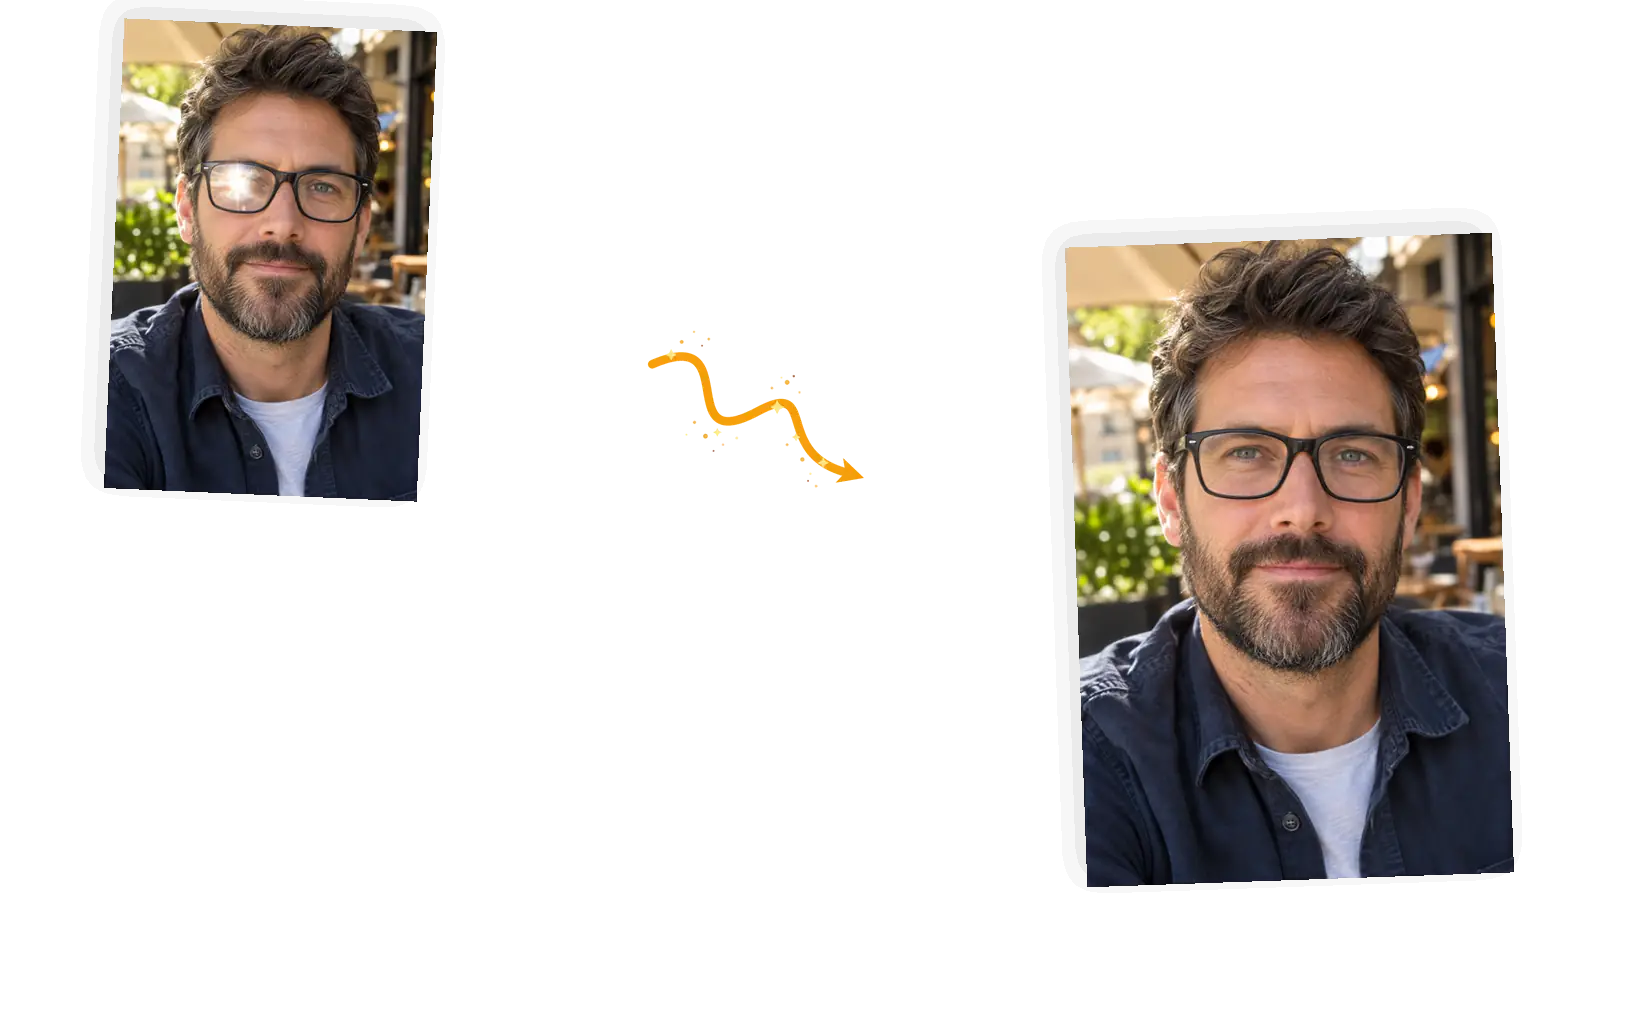
A reflection does not peel off like a sticker; the pixels it covers, including the eye, are new. The model works from the surrounding face and light, so the result can differ from the original. Zoom in and check the eyes before you download.
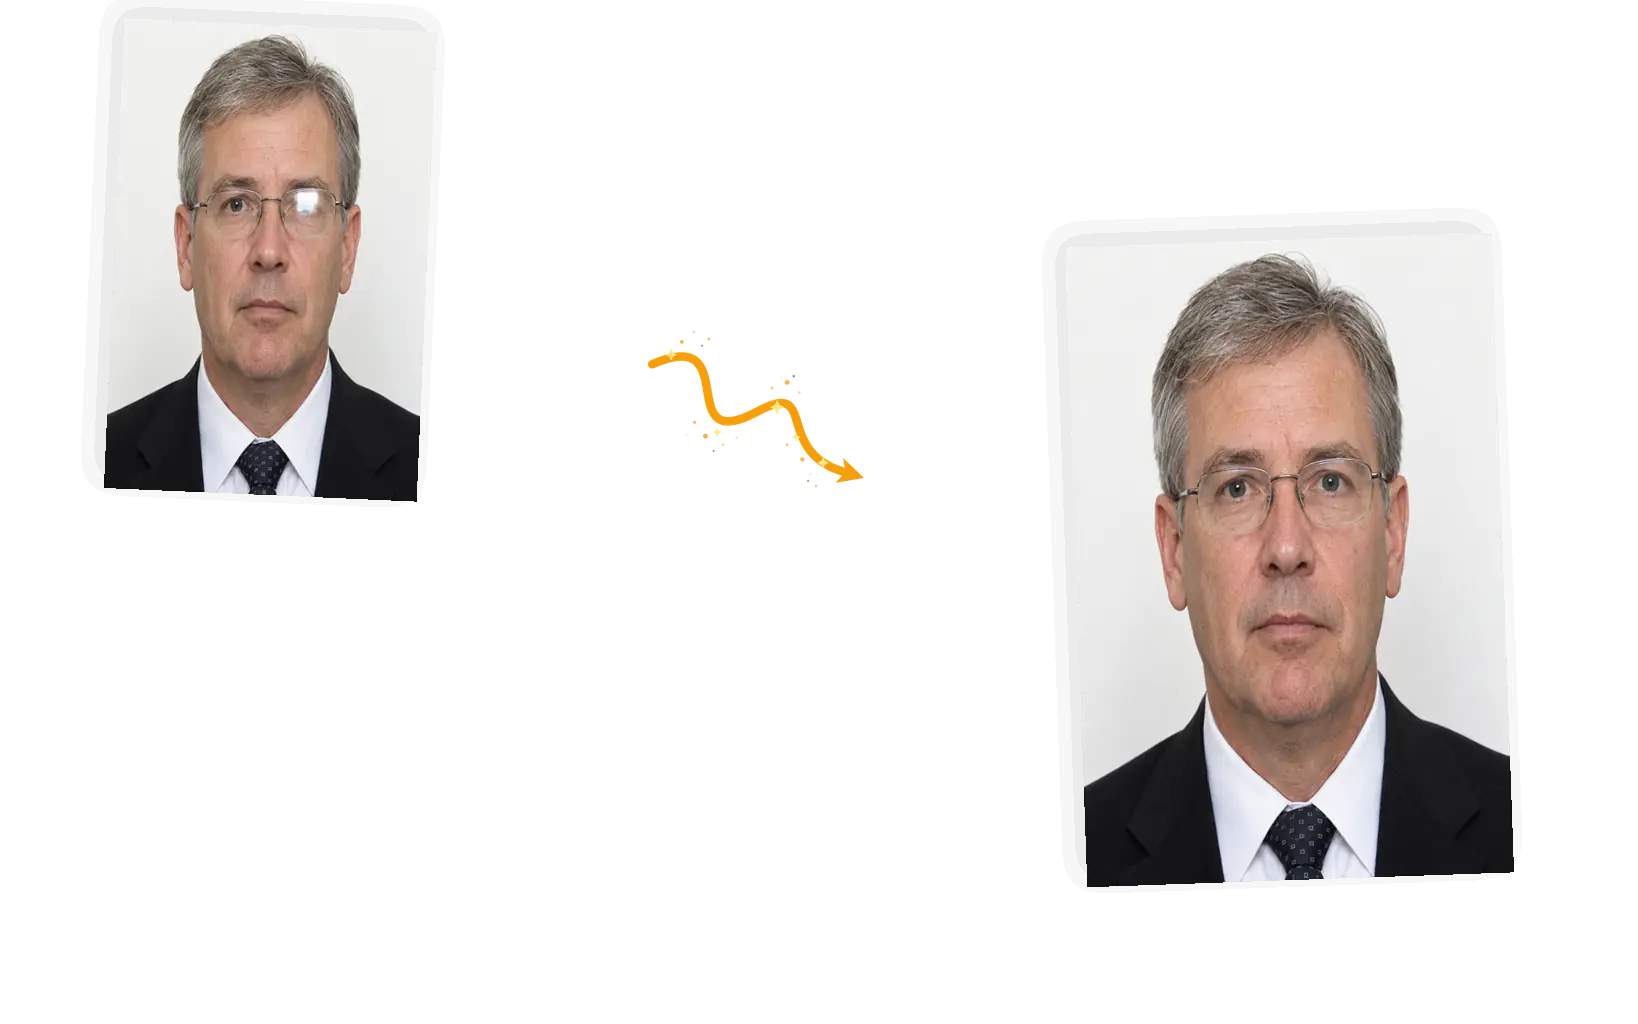
Generative results can vary, and a first pass sometimes leaves a dull patch or softens an eye. Rerun with a sharper description of where the glare sits. Failed tasks return their credits automatically.
A glasses glare remover targets one specific defect: the white hotspot or bright stripe that flash and window light paint across a lens, hiding the eye behind it. To remove glare from glasses used to take healing brushes and a steady hand; here you name the lens and the light that caused it, list what must stay, and the editor rebuilds the covered area with the eye drawn back in. It works on clear lenses, dark sunglasses, and ID-style headshots, one photo at a time. The eye behind the glare is re-drawn rather than recovered, so expect to zoom in, compare the gaze against the rest of the face, and rerun when the match is off. Harsh flash, bright windows, sun off a cheekbone: when the glare has a shape, the prompt has something precise to work on, and the same pattern will remove eye glare from an older scan just as well.
Remove the glare from your photoFive steps from a glare-hidden eye to a clean download. The whole loop runs in the editor on this page.
Drop in a JPEG, PNG, or WebP up to 20MB. A glare with a readable edge gives the prompt a precise target.
Which lens, what light caused it, and what must not change: the eyes as they are, the frames, the hairstyle. One glare per prompt keeps the edit predictable.
Keep the original ratio for most fixes. 1K at 3 credits fits inside the daily free allowance on most photos; pick a higher tier only when the image is bound for print.
The covered area comes back re-drawn, eye included. Zoom in: the gaze should sit naturally in the face and the frames should be intact. Not quite right? Rerun with a sharper location.
Download full resolution with no watermark, or keep editing in the same workspace: a color fix, a rerun, or a fresh crop.
Global brightening lifts the shadows along with the glare and washes the whole frame. Naming the lens edits just that region, so skin tones elsewhere keep their original light.
Hand removal means cloning skin texture through a curved lens and rebuilding an eye with a brush. Describing the glare in a sentence takes a minute and no practice; the editor does the selection work.
Downloads are full resolution and watermark-free, and every edit stays in your workspace. Continue with another fix on the same photo or rerun the glare edit without starting over.
Three ways to get the same job done. The honest differences, not a product takedown.
| Dimension | Manual retouching | General AI chat | This glare remover |
|---|---|---|---|
| Pointing at the glare | Heal and clone by hand around the eye | Describe it in words; the model decides what changes | Name the lens and the light source in the prompt |
| Protecting the rest | Whatever your mask excludes is safe | Limited local control over an uploaded photo | Keep-list in the prompt: face, frames, pose |
| Glare spots per edit | As many as your patience allows | One photo per message, results vary | One glare per edit, one photo at a time |
| Output | Whatever your software exports | Often re-generated at fixed sizes | Original ratio, full-resolution download, no watermark |
| Learning curve | Practice with masks, healing, and clone stamps | Low, but results need heavy checking | A sentence: lens, light source, keep-list |
| Rerunning | Step back and redo the strokes | Regenerate and compare | Rerun with a sharper description; failed tasks refund credits |
The prompt is the whole control surface. These three rules cover most of what goes wrong.
Remove the [glare type] on the [which lens]; keep [the face, the frames, the pose] exactly unchanged.
Too vague
“Make the glasses look clear and fix the bright spot.”
More useful prompt
“Remove the white flash glare from his left lens and rebuild the eye behind it; keep his facial features, the frames, and the background exactly unchanged.”
Too vague
“Take the reflections out of my sunglasses.”
More useful prompt
“Remove the sky and street reflections from her dark sunglass lenses so they read evenly tinted; keep her face, hair, the frames, and the street behind her exactly unchanged.”
Too vague
“Fix the bright stripe across her glasses.”
More useful prompt
“Remove the wide window glare stripe running across both lenses; rebuild her eyes behind it and keep the round wire frames, her hair, and the soft light exactly unchanged.”
Indoor flash bounces straight back off a subject lenses. Portrait shooters hand the frame over to remove glare from glasses and get the eyes the flash hid back into the shot.
A passport-style shot bounced for a white hotspot is not doomed. Retakers clear the glare so both eyes read clearly, then check the issuing office rules before sending anything official.
Street scenes live in dark lenses. Outdoor shooters lift the glare out so the face reads through evenly tinted glass, with the sunny scene around it untouched.
How the glasses glare remover works, what happens to the eyes behind the glass, and what to expect from the edit.
Upload one photo, name the lens, and check the rebuilt eyes up close before you download.