Ghost Mannequin Photography: Shoot, Retouch, or Generate
Ghost mannequin photography turns a flat garment photo into a shaped product shot. Learn the term, the shoot setup, the retouching paths, and how AI generates the effect.
Ghost mannequin photography is a product photo style in which a garment looks lightly worn by an invisible body: the shirt keeps its shape, the collar stands, the sleeves hang the way arms would hold them, and no person or mannequin appears in the frame. The style is also called invisible mannequin photography or the neck joint effect, because the classic workflow photographs the garment on a real mannequin and then erases the mannequin in retouching, rebuilding the hidden collar and inside neckline as if the garment were worn by nobody at all. Clothing sellers favor it because it reads three-dimensional in a product grid, shows the inside labels and neckline clearly, and costs far less than booking a model for every item.
This guide covers the term and its neighbors, a shooting setup that works without a studio, the three post-processing paths with their trade-offs, and the AI route that generates the effect from ordinary garment photos.
What ghost mannequin photography means
The term confuses people because it names a result, not a technique. Nothing about the shoot is ghostly. A typical ghost mannequin photo starts as a normal photo of a shirt on a form or a person, and the effect appears in post production when everything that is not the garment gets removed.
Three terms travel together in product photography, and sellers use them interchangeably even though they describe slightly different things:
| Term | What it usually means |
|---|---|
| Ghost mannequin | The garment floats in the frame with a human-like shape and no visible body |
| Invisible mannequin | Same result; the name describes the mannequin that was there and is now gone |
| Neck joint | The retouching job at the center of the effect: rebuilding the collar and inside neckline after the form is removed |
When a service or tutorial says ghost mannequin effect, it is talking about the finished illusion. When it says neck joint or joint service, it is talking about the editing work. The photography supplies the raw material for both.
What you need before the shoot
The shoot does not require a studio, but it does require discipline, because every shortcut in the shoot becomes an hour of retouching later. Four things matter most.
A garment that holds a shape. Structured pieces such as jackets, dress shirts, and hoodies make the effect look effortless. Soft knits and slinky fabrics collapse without a body inside them, so they need a form or careful stuffing to read as worn.
Even, directional light. One soft light source, or daylight from a single window, with a white foam board bouncing light back into the shadows. Mixed light, for example a warm lamp plus a cool window, makes the fabric read as two different colors and is miserable to fix later.
A clean background. Plain white or light gray, either a wall or a swept floor. The background has to separate from the garment value: a white blouse on a white wall needs a shadow edge or a gray sweep to keep the outline readable.
A camera position at chest height. Straight-on and centered, so the garment is not distorted by perspective. A phone camera is fine; the distance and the height matter more than the sensor.
Three ways to shape the garment without a model
Each of these is a standard setup for ghost mannequin photography on a budget.
Flat lay with shaping. Lay the garment on the floor or a table, sleeve positions adjusted by hand, and photograph from directly above. Insert rolled towels or bubble wrap under the shoulders and chest to give the body some volume, otherwise the result looks like a shirt-shaped rug. This is the easiest setup and the one that needs the most shaping work.
Dress form or mannequin. Put the garment on an inexpensive dress form and photograph it straight on. This gives the most natural silhouette with the least fuss, and it is the classic setup, because the form you will remove is already doing the shaping for you. Pack the neckline with tissue so no hollow shows that retouching would need to invent.
Hanger shoot. Hang the garment on a hook or rack against the wall and photograph it front on. Fast and honest, but the shoulders narrow and the chest reads flat, so it suits t-shirts and casual pieces more than tailored ones.
Whichever setup you pick, shoot the front straight, and for tailored garments add a second frame of the inside neckline and back collar. That second frame is the material the neck joint rebuild uses later.
The three post-production paths
The shoot produces raw material. The effect is produced in post, and there are three ways to do that work, each with a different shape of cost.
Outsource the retouching. Product photography services price ghost mannequin editing per garment, usually with turnaround measured in days and a revision loop handled over email. Quality is predictable and the collar rebuilds are often excellent, because a human retoucher reconstructs what the inside of the garment must look like. The cost scales with volume, which is why catalogs with hundreds of SKUs negotiate bulk rates and small brands feel the per-piece price.
Retouch it yourself. The manual path runs through selection, masking, and compositing: cut the garment off its background, remove the form, and rebuild the neckline from the second frame you shot. It is learnable in a weekend for simple garments and remains fiddly forever for lace, sheer panels, and complex collars. If you already own the photo software and edit regularly, the marginal cost per photo is your time.
Generate the effect with AI. A prompt-driven editor works from the garment photo you already have and produces the mannequin-free version directly, no second frame and no masking pass. This is the path our ghost mannequin tool takes: upload a front photo of the garment, describe the keep-list, and the editor redraws the garment as if worn by an invisible form. It changes the economics for small catalogs the same way the flat lay did: the setup cost drops to minutes, and the per-piece cost drops to credits.
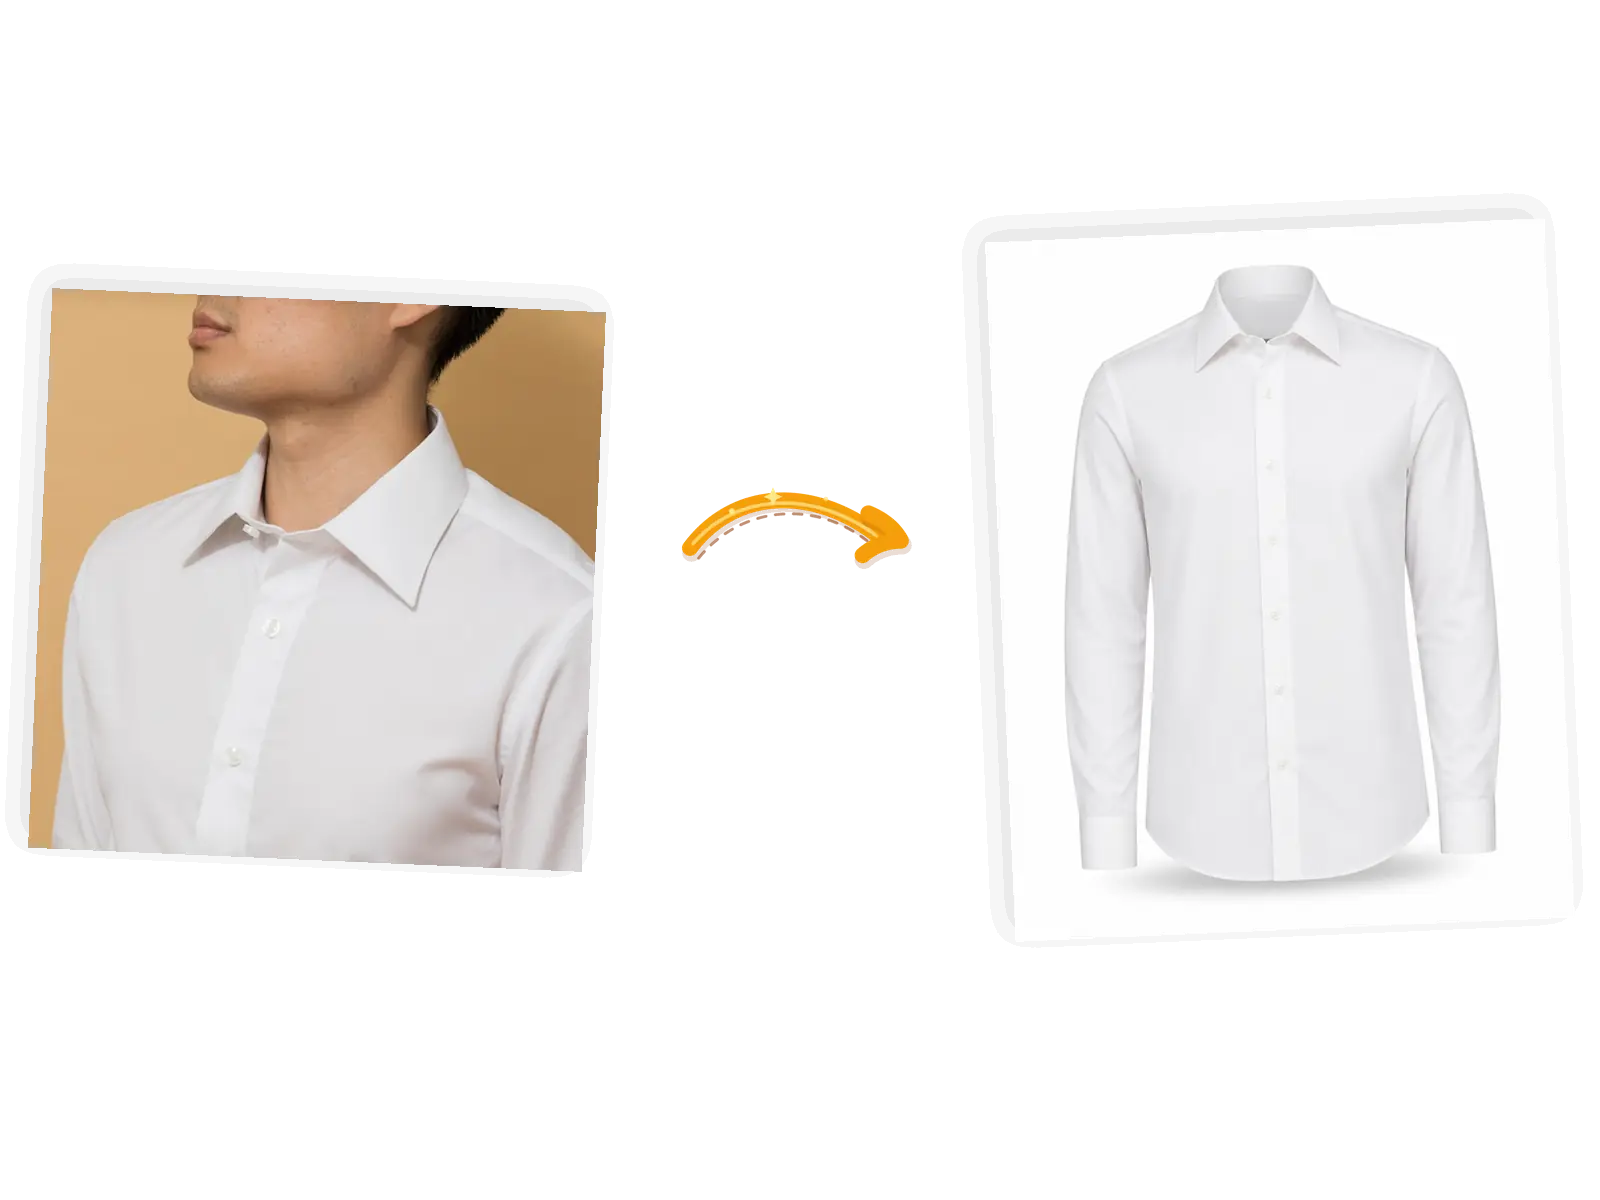
A shirt photo edited into the ghost mannequin style: the garment keeps its shape and collar while the body that held it is gone.
How to generate a ghost mannequin photo with AI
The AI path compresses shoot and post into one loop, and it works with photos you have already taken, including flat lays and old mannequin shots.
- Start with a readable garment photo. Front-on, filling most of the frame, with the garment's outline clearly separable from the background. Wrinkles are fine; a balled-up hoodie is not.
- Open the editor and add the photo. The ghost mannequin tool accepts JPEG, PNG, and WebP files, one garment per edit, with optional reference photos for details.
- Name the effect and the keep-list. A prompt in the shape of "Turn this flat-laid shirt into a ghost mannequin shot: give the body a natural filled shape, keep the fabric color, the collar, the buttons, the print, and the pocket exactly unchanged" directs the edit at the shape, not the garment.
- Generate and inspect. The result is a generated image, and generative results can vary: check the collar, the shoulder line, and any logo against the original at full size. If a seam drifted, rerun with a sharper keep-list.
- Finish the set. Downloads come without watermark at full resolution, and the same workspace handles the rest of the catalog run, so every shirt in the grid gets the same treatment.
Two adjacent tools slot in after the mannequin step. When a catalog needs the garment worn by somebody rather than nobody, the AI fashion model tool puts the same piece on a generated model with a described pose. And when the ghost shot is done, a white background pass normalizes the backdrop for marketplaces that reject off-white canvases.
Common mistakes that break the effect
Most failed ghost mannequin photos fail at the shoot, not in post.
Shoulders that collapse. Without padding, the garment reads deflated and no amount of retouching restores the silhouette. Roll towels under the shoulders are the cheapest fix in the whole workflow.
Necklines invented from nothing. If the shoot gives the retoucher no information about the inside collar, the rebuild guesses, and guesses read as smudges at zoom. Shoot the inside neckline for anything tailored.
Mixed light on fabric. Warm lamp on one side, cool window on the other: the garment becomes two colors and the edit inherits the problem. One light, one temperature.
Over-smoothing in post. Heavy clone-stamping on the neckline produces a plastic sheen that customers notice before they can name it. Texture is evidence the photo is real; keep it.
Prompting the garment instead of the shape. In the AI path, the common failure is a prompt that says "make this shirt look better," which invites the model to redesign the shirt. Direct the edit at the body and the fill, and hold the garment constant with the keep-list.
FAQ
What is ghost mannequin photography used for?
Mostly apparel e-commerce: marketplace listings, brand catalogs, and lookbook grids where the garment needs to read shaped and three-dimensional without a model. It is standard for shirts, jackets, dresses, and hoodies sold size-based rather than fit-based.
Is invisible mannequin the same as ghost mannequin?
Yes. Invisible mannequin, ghost mannequin, and floating garment describe the same result. Neck joint refers to the retouching task inside the workflow, not a different style.
Can I do ghost mannequin photography without a mannequin?
Yes. The flat lay with rolled-towel shaping is the standard no-mannequin route, and the AI path works from flat lays directly. The silhouette will be slightly less structured than a dress-form shoot, which matters most for tailored pieces.
How much does ghost mannequin retouching cost?
Editing services price it per garment, with the price moving on neckline complexity, sleeve count, and volume. Rather than quote numbers that go stale, compare the shape of each path: outsourcing scales with pieces and deadlines, manual retouching is paid in your hours, and AI generation is paid in credits with turnaround measured in seconds.
Can AI create the ghost mannequin effect?
Yes, from a normal garment photo, with no second frame and no masking. The result is generated rather than reconstructed, so inspect collars, logos, and seams against the original, and rerun with a sharper keep-list when a detail drifts. Complex garments with sheer panels and heavy lace are where the manual path still has the edge.
What photos work best for the AI path?
Front-on photos with the garment filling the frame, an even light, and a background the outline clearly separates from. A flat lay photographed from directly above is the ideal starting point for the ghost mannequin tool, and it is also the cheapest setup in the traditional workflow, which makes the two paths easy to combine.
Choosing a path for your catalog
The three paths are not rivals; they are stages. Shoot once with the flat lay or dress-form setup, generate the ghost mannequin versions with AI for the bulk of the catalog, and reserve manual retouching or outsourcing for the hero pieces with complex collars and fabrics. When the product line needs lifestyle context rather than floating garments, AI product photography places the finished piece into a scene, and the same keep-list discipline carries over: name what changes, hold the garment constant, and check the result before it reaches the grid.